Showing posts with label sewing. Show all posts

Thursday 2 January 2014

January

So it's 2014!!! I have to admit I'm not a huge fan of new years.  The evening itself tends to lean towards people going over the top and I've never been a big new years resolution kind of person.  That said I have learnt the benefits of a bit of self reflection and planning some goals for the future so this year I'm trying to embrace it a bit more.

2013 saw the start of blogging for me and also starting to sell one or two bits and pieces that I make.  It's been fun and I think in terms of my crafting I want 2014 to look much the same.  I have some thoughts - they aren't exactly measurable new years resolutions but more a general direction I would like to see things head in this year.

 I want to make sure I take time out regularly to make something new or try a new technique.  I have learnt that I am not so good at re-producing en mass lots of the same thing (I get bored far too easily and end up distracted).  I ended up doing this for the craft fair and I have much more fun tweaking things each time I make them.  

 I also want to keep blogging and build up a network of people that follow me/I follow to keep sharing new and exciting ideas.  I really do enjoy sitting down to write and share with you all what I'm thinking or getting up to.  Plus to help each other out when we get stuck!

 I also want 2014 to be a year where I think a little less about myself and try to look at what is going on around me - in the city where I live, in my country and in the world.  I still have to figure out exactly what this looks like but I'll be sure to share with you as I get more clear on how it is right for me to do this!  If this had a crafty twist to it as well then I'd be pretty happy!

It would be nice to sell a few bits and pieces as I go along over on etsy or on facebook but I don't want to make this the focus of what I do.  I went shopping before Christmas and got some new to me fabric and it was super exciting to spend money that had been made from selling things I make.  So if I could sell enough products that mean it doesn't cost me anything to sew then that would be awesome.  Anything else would be a bonus!

So there you have it - a little bit scatty but a few thoughts for the year - I'm sure there are many other things like getting the garden going and being healthy but with the current deluge of rain outside all I can think about is curling up indoors so for now I just have sewing on the brain!

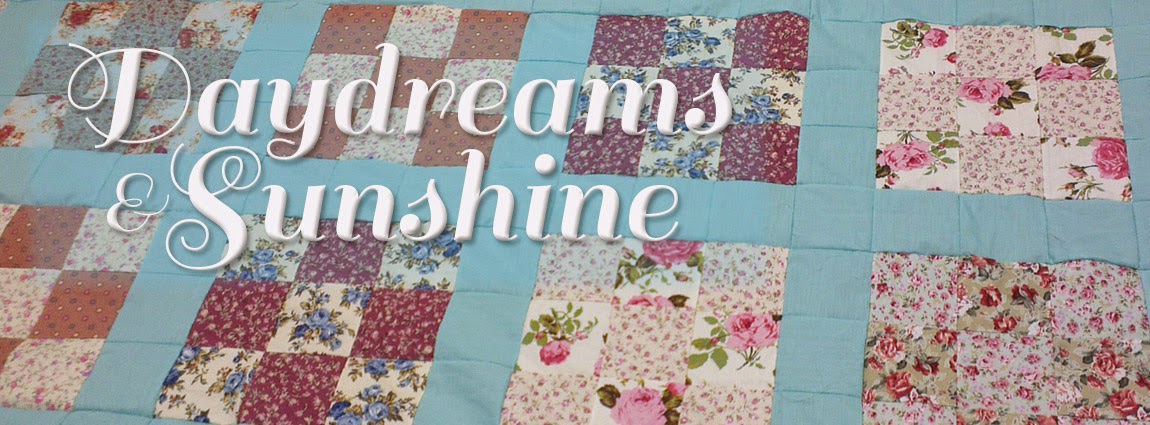
Here are a few of my favorite pieces from 2013.


I hope you all had a wonderful new year and are starting to feel settled again after the madness!  Do send me your projects from 2013!  I'd love to see what you got up to.
Jenni
x


Thursday 28 November 2013

Bunny doorstops

Now I have finished my craft fair and a few other bits and pieces it leaves me open to concentrate on projects that I have promised to friends for a long time.
 A friend asked me a month or so ago about making my bunny softies in to doorstops.  We agreed some fabric and off I went to forget about it for ages until finally today I found some time to have a play!  Luckily I had half done this one already so no need for my sewing machine!
 So how did I do it?  I took the template that can be found here and cut out the fabric of my choice and a lining fabric.  I then made an oval out of both my lining and my choice fabric.  The oval needs to be the length of the base of the bunny from toe to tale :)

Then I simply placed the choice fabric right sides together and stitched round placing the oval between the toe and the tale.  I left a full line between the toe and the tale open on one side.  I repeated with the lining.

Then I had a bit of a fiddle - first filling the lining with rice, giving up on that and attempting to skip the lining and then going back to my original plan. So I put some rice into my choice fabric right up to the ears to maintain the shape and then slotted the lining inside. I poured in rice until it was pretty full and then I had stitched the lining closed.  I then added some extra rice into the cheeks of the bunny and around the neck to stop it from slouching down when the rice in the lining shifted position.  I lined the base of the bunny with pennies and then folded over the fabric and stitched tightly together.
This is the finished product.

To be honest once I have fiddled around some more I may well end up making my friend a new one as this is by no means perfect but as a first doorstop attempt I am pretty happy with it.  I can see why so many doorstops are one block like shape with an image sewn on rather than a shape as it is pretty tricky to shape it correctly.

In my house rice and a few coins are plenty heavy enough but if you lived in a house that had self closing fire doors I think it may not quite be enough and you would need to use something like sand that had more weight in it.

Have you got any unusual doorstops?  Or ideas for the next one I make?  Let me know :)
x

Wednesday 27 November 2013

An ode to my sewing machine

So this week has involved a lot less sewing and a lot more chilling which in a way has been nice - unfortunately my trooper of a sewing machine seems to have given up on me at last.  My parents bought me my sewing machine as a present when I was doing textiles at school.  It's a basic Toyota model and probably should have died years ago.  When I started making my wedding dress I thought for sure it wouldn't keep up but it did and slowly I did more and more projects on it. 12 years, 2 wedding dresses, 2 bridesmaids dresses, 1 prom dress and countless projects later I think it has finally died.  So it is hand stitching for me for a bit until I save up some pennies to get a new one!


I don't have pictures of my prom dress but here is a little ode to my sewing machines happy life over the last 5 years or so!  :)

Before my machine died on me I was sent a collection of odds and ends of fabric that a friend had.  This is what I sent her back!

Truly a lesson never to throw away that bag of scraps of fabric because you never know what could be dreamt up and created.  Two quilted stockings for her beautiful two children, a heart garland and two zipper pouches for those bits and pieces that don't belong anywhere .

I'll be on the look out for hand sewn projects, maybe a bit of knitting and possibly some activist cross stitching in the next few weeks!  Watch this space - as always I'll share all! 

x

Monday 11 November 2013

New Steps

This morning I have spent some time playing around with photos and opening up my ETSY shop.  I am using this as a trial to be honest - I've heard so many mixed reviews on people's successes and failures linking in with etsy that I decided to give it a shot and try it out myself.
 I've uploaded just 4 products because I am still preparing for the craft fair that is coming up so all my stock is needed to fill the table there.  Once that is done I plan to begin uploading more products regularly and just see how it goes.

I've already realized a few things - I need to learn to improve my photography skills and to do this effectively I need to be very efficient.  I can take reasonable pictures but then I upload them and set about attempting to do a bit of editing (of course armed with google) and see my photos turn into disaster areas.  I've tried something similar before when me and my husband did a batch of screen printing - our biggest challenge by far was the editing of photos to prepare the prints.  But with some time and patience we got much better and we ended up with some pretty cool prints ( well I thought so anyway ).  So a challenge for myself - in between everything else - is to work on photos.  On etsy you can't pick up your products, touch them and imagine them in your home or wardrobe so great photos are everything.
 The efficiency thing I guess is just about realizing that your time needs to be managed really well to craft, dream up ideas, shop for fabrics, edit photos and talk to potential customers - all that while holding a full time job, staying in touch with friends and loving blogging to you guys.  Well whatever happens so far I've been enjoying every second so I figure while I am still having fun I will continue!

Anyway it is a new step in my upcycling adventure so I will keep you posted on how it all goes!

Here is the link if you want to check it out!

ETSY SHOP!!!

Have fun browsing and as always feel free to feedback - I plan to share everything from this journey I'm on - the good, the bad and the massively embarrassing errors - on this blog so feedback to me might reduce some of my red faced moments!  Enjoy and link me up with your shops too so we can help each other out!

Friday 25 October 2013

Pillow case to skirt


My love of making clothes/bags/gifts or anything really out of other abandoned things came more from a love of beautiful and unusual fabric than anything else.  My passion grew into a desire to see less waste and a choice to try to dress in more ethically sourced clothes.  On a tight budget and working for a small agency having just returned to the UK from a few years away I began to find treasures tucked in charity shops.  I realized what great outfits could be conjured up from a scrap of fabric, an old bed sheet or a discarded dress being sold off extra cheap because of the gaping hole in the shoulder.  And so my love of colours, sewing, fabric and clothes grew – and I spent many a weekend  nestled away cutting, pinning, gathering and sewing to make all sorts of creations.

So today I’m setting you a challenge.  Delve into the depths of your linen cupboard, head to your nans to rummage through hers or go on a charity shop/jumble/car boot sale rummage in search of the funkiest pillow case you can find.  I usually find you can pick one up for about 50p sometimes a bit more for a pair.   Today I found a matching pair for 60p – bargain!

And out of this you’re going to make a cute, gathered skirt!

What you need . . .
  • A pillowcase (2 for sizes more than UK14) in a pattern you love
  • A plain pillowcase or piece of fabric of similar size for the waistband (because I am using a pair I used the other side of the pillowcase)
  • A ribbon or strip of fabric that is about 15cm wide and 30cm longer than your hip measurement
  • Dressmakers pins
  • A sewing machine or a needle
  • Thread
  • An un-picker (not essential but helpful in any task involving salvaging fabric)

SIZING
Measure around your hips (or waist if you prefer to wear your skirts there)
Take that number and make a note of it.  We will call that number X.  Now follow the formula below.
X ÷2 = Y
Y + X = T or the total length of fabric you will need
T ÷ 2 = F or the length your two pieces from step 2 need to be.

So let's go . . .

1. U npick the stitches that are holding the pillowcase together and pull
out all loose threads. Trim the edges that are unusable from
 previous stitching but try to only cut off what you have to.


4. Now set your machine (if you’re using one) so it is set to sew the longest stitch.  Using this setting sew along the top of the fabric two parallel lines ensuring they do not touch and are around 1 cm apart.  Ensure you leave threads at the start and end of your line of stitching that you will be able to get hold of. 


6. Now you have your gathering you need to take the measurement you took earlier-figure X - and ease out the fabric to equal that measurement.  Leave 4cm extra as this is where you will sew your seam.  Use your fingers to spread the gathering out so that it is even and the correct size for you.


9.  Now choose your fastening – I have done mine with a tie at the top to finish and a zip but you can add a button, zip or hook and eye – whichever suits you.  If you choose a tie just extend the waistband to a length that means you can tie a cute bow.
Take the open seam and put right sides together – do a straight stitch right up to where your fastening is.  If you have put in a zip this is where you would add it.  I will add a tutorial on how to insert a zip next week.


So there you have it a skirt sewn from a pair of pillow cases for only 60p!  Plus a happy day spent sewing!


Next week I'll do a tutorial on how to add in a zip so that if anyone chose this to be their fastening there won't be any confusion!

Happy sewing :)
x


Sunday 13 October 2013

Pleats tutorial

Hi all
What a rainy weekend it has turned out to be!  I have spent much of my time at work so am hoping it will rain itself out as I head towards some much needed time off!  Though I would take some time this morning to blog my tutorial on pleats.

I love pleats - they are cute and look gorgeous when done right.  I love the shape they add to clothes and as you saw in my last post I've started to use them in bags as well.  They can be adapted to any style you like and any shape or size so for me it is a must in your stash of sewing skills.

So what will you need - your fabric of choice, dress pins, a tape measure, tailors chalk, iron and a needle/sewing machine and thread.

1.  You need to measure the length of your fabric and decide how big your pleats will be.  I chose 2cm pleats to be every 4cms.  This means that in total I will need 10cm per pleat because the fold uses 3x2cm of fabric.  To work this out for your pleats take the size you chose for your pleat, times it by 3 and then add this figure to the gap you want between pleats.  I marked this out along the top of the fabric using pen so you can see it but you will want to use tailors chalk that won't mark or run ink over your fabric.
So I have marked 0cm then 4cm then 8cm then 10cm.  Then I repeat this again until I reach the end of the fabric.

2. You now want to start folding the fabric to create the pleats.  You want to take the 8cm marking and bring it over the the 4cm marking
This should mean that the 10 cm marking sits just on the fold leaving you with a neat 2cm pleat.  Pin this with the pin pointing up towards the edge of your fabric.  Then you repeat the step taking the 8cm back to the 4cm and pinning until you reach the end of your fabric. You should be left with something a little like this.
As you can see it creates a nice curve to the fabric which is why pleating is often used for skirts - it perfectly sets up the waist band.

3. Now you want to press this out.  This is a really important step if you want your pleats to sit nicely.  The fabric should naturally show you how long the pleats fall - if you want a full pleat all the way to the bottom of your fabric you need to ensure you measure the pleats all the way down otherwise they will loose some of their shape.

4. Finally you run a straight stitch along the top of the fabric and remove your pins.  While you are sewing check that the pleats aren't folding up under your machine foot (if your using a machine) and adjust as you got to ensure they are going through the machine perfectly flat.

Now you add this to your skirt or bag or whatever it is that you are using it for.  This is a skirt that I made a year of so ago out of round table cloth.  I used pleats to bring it in to fit me at the waist and it gives the skirt such  a full feel - perfect for twirling I have to say :)

If you decide you want to do box pleats you follow the same idea except you turn the folds round.  SO the first fold you would bring the 8cm to the 4cm mark.  Then you would swap and bring the 4cm to the 8cm and continue alternating to create a boxed look on your product.

Have fun experimenting and as always give me a post of anything you produce!


Tuesday 10 September 2013

Getting my applique on!


So I've been sewing for quite a while now and in a more focused way for a number of months.  It is easy to get stuck in a bit of a rut and just do the same things over and over again with different fabric.  So I'm trying to make myself practice different techniques and maybe make some more interesting projects rather than just rely on finding fabulous fabrics to make things fun! (although I will always love beautiful fabrics)

Today it was all about applique.  I've done it before but never quite gotten the neatness that I want in a finished product.  I sat down and have had a good play around - practice session over and I set to work.

I found that choosing a stitch length just above zero worked best for me and then selecting the narrowest zig zag stitch that my machine offered.  I don't have a special foot for my machine to do applique so just used a standard one.  Once I got going my best advice would be to take it slow and steady.

I had bought some great fabric at a charity shop last week so decided to use some of it to make an apron and to incorporate in one of my favourite shapes - a star!  So here was how it went.


I printed out a template of a star to make sure it was completely the shape I wanted and then cut the fabric to this template. I prepared the pocket out of plain fabric so that it was ready to go onto the apron and then placed my star on and ironed.
  A slow and steady zig zag round all the edges of the star sealed in the raw edges of the star and gives it a really neat look.  

This is such a simple sewing technique and if you take time to do it well it can look really effective.  This is my finished product and you can see how just adding the star adds something more to the apron.  
It is also such a good technique that uses up small scraps of fabric and turns them into something beautiful.


I'll keep working on improving my applique and let you know about how it goes.  I'm trying to decide what stitching technique to try out next - have you got any suggestions?  I'm willing to give anything to go and blog about it - even if my attempts don't go as planned :)

I hope you all have a wonderful week and as always if you give this a go then please do share photos!

Sunday 8 September 2013

I love a bit of upcycling

I love a challenge and I especially love an up-cycling challenge.  I went to visit a friend this week who was given a cute t-shirt with a picture of a guinea pig on it.  Given her love for her own little pigs this was a great gift but the shirt was too big for her.  So rather than let the shirt sit in the wardrobe for years or end up being used as a night shift we agreed a bit of intervention was required.

Here is what I started with

What a cute face! :)

The issue I had with this project was just how big the face actually was.  Removing any part of the face distorted the photo so I knew the bag was going to have to be pretty big.  I decided to add some t-shirt fabric in a neutral colour that I already had and curved the edges to reduce the size a little bit.
 This is the finished product

I embraced the size and went with it in the end with some chunky handles and side panels to make it have a bit of depth.  This bag will be a perfect companion on days out to the beach or heading to the shops.  As I was creating for http://www.pinkhot.co.uk/ I reckon this could be a perfect bag to carry her beads and projects around in!  Check out her site there are some wonderful pieces on it!

I'm pretty happy with it and think it totally proves you can always make something usable from the things in your wardrobe!


Thursday 5 September 2013

I love sewing but writings pretty great too!

I love sitting down and sewing! I think anyone who knows me or read this blog once or twice would realize that pretty quickly! Fabric - colour - prints - new projects - ideas - finished projects - I love it all!  I started doing the blog because it was mentioned by a number of people and I thought it might be fun - what I didn't realize was quite how much I would enjoy it.

I try to write once or twice a week and other than a little blip seem to be having reasonable success in this area.  I actually look forward to putting everything to one side and sitting down to write.  I was concerned at first that blogging would become another thing on a never ending to-do list, just a chore to tick off but it has turned into the opposite.

How rarely do I stop and take time to reflect on what I am doing? How little time do I spend considering my next step?  I fly quickly from thing to thing and suddenly I am making time to sit and think - to write about what I'm thinking or what I've made this week.  I'm finding that time out energises me and gives me space to enjoy the things that are going on around me.

I've also been amazed at the sudden connection with other like minded people spread out over the web.  Sharing their skills, questions and advice with one another.  Celebrating the skill and talent that each one brings.  It's been brilliant!  Social networking - when used to celebrate one another - is really good fun!

So what am I saying? I guess I'm just writing today to express my realisation that I'm loving blogging.  So thank you to all of you who read, comment, like and share the things I've been putting up! It really does put a smile on my face and I love hearing from you all!

This weekend I'm planning to take some time to craft with the new fabric I got yesterday and as the weather's meant to turn I'm imagining being tucked up in my attic with the rain beating down on the windows.  Whatever I make though I'll be sure to blog about it!

Wednesday 28 August 2013

Productivity!

Today has turned into a pretty good day.  I had some time off just for me - yay - and last night was thinking I wouldn't be able to fit everything in as well as spend some decent time up in the attic sewing.  I woke up this morning and decided to just try and do everything.

  Out the house by 8am for a quick run (quick as in short not really very fast at all I'm afraid) and home again to clean the house and shower.  I sorted what felt like a mountain of laundry and jumped on my bike to pop round the charity shops.  Surprisingly this mission was due to a lack of clothes that fit me these days rather than my usual fabric hunt so the hunt for jeans began.  4 shops later and I had 2 new to me pairs of jeans and 2  tops - quite enough for one day.  Looking at what I have bought reminds me that there is really no reason not to get stuff 2nd hand.  It's ethical, cheap and you find some fabulous things.  This is one outfit I bought today which in total cost me £7 - I mean really! I have to admit I'm so happy I have a really fabulous pair of flares again!  I love them so much more than skinny jeans!


After that I picked up some food shopping and popped into Akrams Oriental Supermarket to stock up on spices and Tabasco and I wobbled home on my bicycle - just a tad over loaded!

Lunch at home with fresh rocket snipped from my garden today left me feeling super duper happy that I am actually able to eat something that I have grown!  Which led me perfectly to heading upstairs to nestle myself away in the attic and sew.

The sunshine has been shining so brightly today and as I was sewing it poured in through the slanted windows - combine that with a gentle breeze and how could anyone not be inspired to create lovely things.

I finished off a few projects that required completion and then turned my attention to some fabric I picked up a few weeks ago courtesy of my local Sue Ryder shop.  And this is what I made - a fun skirt with a simple smocked waist band.


 If you fancy making it just follow the directions for the kids summer dress.  Just replace the chest measurement with your waist/hips and make the skirt as long or short as you want it!  Follow this link to bring you to that tutorial!
http://daydreamsandsunshine.blogspot.co.uk/2013/07/summer-dress.html

So my conclusion is that sometimes the more you get done the more productive you become!  More busy definitely did make more time today!

Well happy sewing and as always post me some pics of your work and I'll share them on the Facebook page!

Sunday 25 August 2013

Pillow Case to Tote Bag


I’ve been trying to use up the fabric that I have had in my boxes for a long time and came across a gorgeous pillow case that I discovered months ago hidden deep in mounds of bedding in a charity shop.  I loved the colours and the flowers but wasn’t really sure what I was going to make out of it.

This week I decided to make it into a tote bag – some stitching and lining later and I ended up with a finished product that was so much better than the pillow case I’d started out with.


Tote bags are great for days out in the sun, trips with the family and carrying as a shopping bag.  If you make them out of recycled fabric then not only are they preventing the use of plastic bags but ethically and sustainable produced too.  Combine that with a relaxing afternoon spent sewing and you have a sustainable, ethical and fun filled bag!

Get those machines out and get sewing!

1.        Decide how big you want your bag to be and cut two rectangles 1.5cm bigger than that all around.  Cut out two rectangles of the same size from a plain lining fabric.   Then cut two long strips that will make up the handles.  I did mine either side of the pillow case and to a 6cm width

IMAG0607.jpg


2.       Now place the large rectangles right sides together for both the patterned and the lining fabric.  Sew both sides and the bottom of the fabric.  Now turn these out so that you can see the pouch that will make up your bag.


3.       Take the thin strips and fold them in half lengthways.  Sew a line from top to bottom about 1cm away from the raw edges.  Take a safety pin and pin it to one side of the fabric.  Point the pin into the tube of fabric and begin to ease it through pulling the fabric gently as you go.  This should thread through leaving you a tube of fabric with the right side facing you.

IMAG0608.jpg

4.       Press your handles, bag and lining to leave neat, crisp lines.


5.       Place the lining so the raw edges are facing you and put it inside of the patterned fabric.  All your raw edges should now be hidden.  Fold the tops over to create a neat seam between the patterned and the lining fabric.  Pace the handles flat about 4cm away from each edge and tuck them in between the lining and patterned fabric.

IMAG0609.jpg

6.       Pin and ensure everything matches up and sits as you want it to.  Make any adjustments and  then stitch a line around the top of the bag ensuring you stay the same distance from the top as this is a visible stitch.


IMG_20130822_091714.jpg And there you  have it - just trim your loose threads - your finished product!

Wednesday 21 August 2013

Waste not Want not!

That old saying 'waste not want not' is probably unintentionally the moto for my sewing activity.  I love crafting and creating things but there is something extremely satisfying for me about making something out of 'nothing'.  By nothing I mean - scraps or rubbish - something that someone else was about to throw away or something that seems useless.

I love someone complimenting a skirt I have made and being able to say 'this? thanks - I made it from a pillow case, duvet, shirt, scrap etc etc'
 This week I did some alterations for a friend and took up the hem of her dress.  This left me with a strip of fabric too thin for much to be honest so I decided to turn the leftovers into a hair band.  Simple but something I wear often on those days when an outfit needs that extra touch or when my hair just decides to be disastrous and covering up is the safer option!
 So how did I do it?  Simple, quick and easy as can be.

You will need;
- a long scrap of fabric - mine was about 5cm wide but you can make yours much wider to create a thicker band.
-needle
-thread
-safety pin
-pins

1.  Cut your fabric to the length and width you require.  The final band width will be half of the fabric minus about 1.5cm seam allowance on both sides of the fabric.  It is important that you try to keep this as straight as possible so if you can use a ruler or measure to get straight lines.

2. Fold your fabric half way down the length of it so that the right side of the fabric is facing inwards touching.


You can see that mine still had the hem of the dress on it which I made sure didn't show in the final product by sewing to the left of the stitching.

3. Pin together and sew a straight line from one side to the other ensuring your seam allowance remains the same from start to finish

4. Now take your safety pin and attach it to one side of the tube you have created.  Push the saftey pin into the tube and gently ease it through teasing the fabric out as you go.  Once the safety pin is through the other end of the tube the fabric should pull through easily so you can now see the right side of the fabric in a tube.

5. Fold the raw edges into the tube at each end of the hair band.  This can be done to create a straight edge or you can create a slant so that the band naturally slants towards a point at each edge.

6. Now stitch each end and trim all loose threads.  Press the band and pair it with an outfit of your choice!


And there you have it the finished product!  Nothing needs to be wasted especially not fabric!  The whole project should take no longer than half an hour if you are stitching with a machine and it creates a great accessory out of something that otherwise might have gone in the bin!  It makes a cute gift too!

Happy sewing!

Saturday 17 August 2013

The therapy of sewing

This week I have been using up my odds and ends of fabric to make little bits and pieces - cushion hearts and coin purses mainly.

Because of the size and light nature of the fabric I've been hand sewing as a pose to sitting at the machine.  Now don't get me wrong I love my machine - I love the speed, the straight lines, all the different stitches and generally how simple it makes bigger projects. But sitting down on the sofa with a needle and thread has a very different charm.

I've been enjoying watching each single stitch develop and the repetitive motion of weaving in and out of the fabric.  I've enjoyed the extra time it takes and the close attention that can be paid to the development of each project.  Sitting quietly isn't something that happens a whole lot in my life and patience certainly isn't my natural gift.  Between a job that involves constant interaction with people to generally being an individual who loves to talk endlessly I sometimes could go days without being quiet and taking time to sit and think.  When I'm sitting at the machine it's wizzing away and I think just about what's in front of me.

  So this week to suddenly stop for periods of time to sew by hand and just be has been quite different.  Yet I loved it - my conclusion is that sewing is my kind of therapy. 

I can talk constantly but actually say very little. This is something I've been told a number of times in my life.  But stopping talking and just being with my thoughts is a quite different feeling.

Watching a project steadily develop, feeling productive and yet embracing the peaceful quiet around me and enjoying my time to process my thoughts has been amazing.  Everyone needs their bit of 'me time' and for everyone it looks a little different.
For me as I focus on crafting more regularly I'm going to try to make sure that a part of that each week will be without the machine - sewing by hand or maybe doing some knitting - something where I can sit and enjoy my own thoughts.  Honestly I'd recommend it!  I might even keep my eye out for a comfy chair as an addition to my attic craft space - somewhere I can curl up, sew and enjoy the sky above me.  Sounds like a freecycle check is in order :-)

Wednesday 14 August 2013

Stuffed bunnies

This week I have been working in the afternoons so have spent happy mornings in my attic stitching away.  It has turned into a productive week with a maxi dress finished (photos will come shortly), a few tote bags made, some coin purses stitched and I've also been making these adorable stuffed bunnies.


This blog post just proves that these days you can find anything you want on the internet.  I had been wanting to make some cute stuffed animals but due to my terrible drawing skills I needed a template.  A quick flick through Google images and I found one!

This wonderful blogger has also shared a ready written how to guide so I'm not going to repeat her good work but just share it for you all to follow.  So please check it out!

http://www.craftycupboard.net/2013/03/bunny-softies-with-free-template.html

I plan to add some little eyes to the bunny with some buttons on some and on others a little cross made out of embroidery thread.

As always I have made these bunnies from fabric that has been sourced from charity shops, ebay and other up-cycling projects.  I've been amazed at the luck I have had recently in finding beautiful fabrics that are in amazing condition being sold off for pennies.

Here is a selection of my recent finds - any suggestions of what you think I should do with them???


Hope your all enjoying your week - will post again soon :)

Thursday 8 August 2013

Back to the blog - how to make EYE MASKS

After a few weeks away with sickness and all sorts going on I thought on this gorgeously sunny morning I would complete a project and do some blogging.
 I recently signed up to do a craft fair for the first time.  It's all a bit of an experiment to be honest but it has got me thinking of new things that I can make that people would enjoy owning or giving as gifts.  This morning I made an eye mask which was surprisingly simple, reasonably quick and gives a good professional finish which is always very satisfying.

To do this project you will need:

  • Fabric in the pattern of your choice
  • A sheet of thin foam ( I used craft foam for kids)
  • A backing fabric
  • Paper for the stencil, pencil and scissors
  • Pins
  • Elastic
  • Bias binding
  • The usual needle and thread :)
You need to cut out your template - I traced an eye mask I already had but a quick look in google images will give you a selection to print and trace if you aren't confident with your free hand. 
Now pin the template onto the fabric and cut around as you would with any pattern.  Repeat this on your foam and your backing fabric.
Place all three together - backing fabric then foam then your patterned fabric on top facing right side upwards.  Now pin together to avoid movement and sew around the edge.  It helps to stay close to the edge so you aren't going to have a hard time hiding the stitching later.
You should be left with something like this.


Now take your bias binding and elastic.  You need to mark with a pin where you want your elastic to sit on either side of the mask.  It needs to be placed at an equal distance on both sides from the top and the bottom to ensure you don't end up with a wonky mask.
 Begin to fold the bias binding round the edge of the mask and pin in place.  As you reach the points for your elastic insert the elastic into the fold at the back of the mask.  The elastic should just lie flat against the mask.


 Now you need to choose a thread that matches the bias binding or choose an appropriate contrast.  You now need to sew round the edge of the bias binding adjusting as you go to avoid any creases.  At this point it is worth going slow and steady and staying close to the edge of the binding.  This line of stitching will show and makes part of the finished product so it is important the stitching is neat and steady.

Now trim any loose threads and there you have it - a perfect gift for yourself or someone else!  Enjoy and don't forget to send me pics of your progress - you can tweet me @jenniwessels


Till next time :) 


Monday 8 July 2013

Presents - home made? ? ?

Summer for me brings a spattering of birthdays and celebrations.  Being in the middle of this time again got me to thinking about presents.  Most people love giving and receiving a good gift - it truly warms the heart to realise someone has considered what you would love and who you are.  At the same time there is something wonderful about watching a friend or family member get that feeling after opening something you gave.

I've been thinking about what really makes a great gift - is it having something you really wanted or is it knowing that someone put in some time to make or choose that gift rather than grabbing it at the end of a weekly food shop?

One of the best gifts my parents got me was my sewing machine - 15years old I think and over a decade later it's still with me!  They knew I would love it - I think I actually asked for one - and it has truly been a useful gift :-).  At the same time other much smaller gifts have left great impressions on me - knowing that person really knows me well.

A few years ago I was flat broke and started making presents.  I wanted to still be able to give things but really couldn't afford great shop bought gifts.  I have to admit that some of my early attempts at gifts have probably been discarded at the back of a cupboard somewhere.  I like to think that my home made gifts have improved in their quality but the heart intention is still the same- to make that individual aware that I have been thinking of them and how special they are.  Home made presents do have the risk of being useless and tacky- things you would actually never pay money for.
Spending a bit more money and heading to the shops doesn't of course guarantee you won't be still giving something useless and tacky but the risk is probably reduced somewhat!

All that considered I think my moto now is if I'm inspired to make something then that's what I go with - if not I head to the shops and hope I find some inspiration there.  I am trying not to automatically make everything for the sake of it instead trying to maintain some authenticity to my crafting.

So what do you prefer to give/receive?

Is it home made or shop bought?

Let me know :-)

Saturday 6 July 2013

Summer dress

So following on from my last post I've been making a summer dress for a toddler.  The pattern is versatile and can be adapted to anyone of any size - adult or child.
To make this you will need a sewing machine, measuring table, thread, scissors, shearing elastic, a safety pin and fabric of your choice.

You need to start by taking a chest measurement from the fullest part of your chest.  Then follow this simple formula that I found in this fabulous book http://www.amazon.co.uk/Making-Stuff-Alternative-Interior-Design/dp/1904772617

Chest measurement / 4 = x
Chest + x = y
y / 2 = z

So for my dress for a 3 year old the chest is 53cm and z = 33cm.
That is the width of the top of your fabric and makes the top of the diagram - now follow the diagram below.

The first box is for the smocking so for a three year old I did a length of 15cm but you need to decide how long you want the smocking to be for your garment. Then continue the box down to equal the length of your dress ( for me it was 46cm top hem to bottom hem ).  The wings on either side are coming down so the bottom point is a third of your Z measurement on both sides ( for me 11cm ).  Adding this gives the dress a full skirt which really adds to the finish.

Mark this pattern out and lay fabric out.

Cut out the fabric to the shape above twice ensuring you leave a 2,5cm seam allowance on top of all your measurements.  Now you have two pieces of fabric in this shape.

Place the fabric so that the right sides (or part of the fabric you want to be the outside of the dress) are facing together.  Now sew the seam along both sides using a straight line stitch.  You will need to seal the raw edges of the fabric to avoid fraying which can be done using an overlocker or a simple zig zag stitch.
You now should have something like this.


Complete a hem along the top and bottom of the dress.  Do this by folding over around 1cm of fabric and stitching around the fold.
Then repeat this process again folding the fabric over.  This time ensure your stitching stays the same distance from the edge of the fold as this will show on your finished garment.  This will result in no raw edges and a neat hem.

Now you move onto the smocking - prepare your machine as explained in the last blog post.http://daydreamsandsunshine.blogspot.co.uk/2013/06/i-love-smocking.html   Now sew a line along the top of the fabric about 0.5cm from the edge and when you reach your starting point guide the machine around a cm below your first line and continue.  
Use the back stitch setting for a few stitches at the start and end of your smocking.
  Your fabric will gather more as you continue.  Try to make sure you keep sewing straight and don't allow the fabric to bunch under the needle as this will show.


You now have a finished garment if you chose to make a strapless dress however I have chosen to add some simple straps to finish it off which makes this perfect for a child running around in the summer.

You will need to decide for your pattern how long you need your straps to be but for this dress I have made four strips of 25cms long.  I cut strips of 4cm and folded them over so the right side of the fabric was facing each other.
I then stitched a straight line around a cm away from the fold.  Trim the raw edge and you will have 4 strips like this.

Now take a safety pin and attach to the end ensuring you are not too close to the edge as then it could fray.  Push the safety pin into the tube and begin to thread it through.  This is fiddly and requires some patience (you can also buy a hook that makes it easier).  As the safety pin comes through the other end the fabric should easily turn until you have a neat tube.  If you find the tube gets stuck just pull it gently in the opposite direction so that you remove the bunching and begin again.

Tuck in the raw ends and stitch.  Now attach with a straight line stitch to the top of the dress matching the distance from the seams on the front and the back of your dress.
Trim your loose threads and you have a great dress that you made yourself!  The sleeves fasten at the top in a cute bow.


I hope you have a fab time making this!  It's such a satisfying project because it doesn't take too long but looks so professional! Share your pictures when you finish and get ready to proudly say 'I made this!' :-)

Sunday 30 June 2013

I love smocking!

Summer is here - for this weekend at least! And the arrival of sunshine means light flowing skirts and summer dresses.  Yay!
The simplest way to make one of these is using smocking which I LOVE!
It adds a professional, finished look while creating a good fit.  When I wear something I've made and used smocking people are the most surprised that I made it - yet it's so simple!

So how to smock . . .

You need a sewing machine and some shearing elastic ( usually 70p or there shouts).  You simply want to wind the elastic onto your bobbin taking care not to stretch the elastic.  This must be done by hand and not using the machines bobbin winder. 

Now use a standard cotton thread for the needle and thread the machine as usual.  This thread is going to show so choose an appropriate colour for your garment.

Now start sewing - you want to start with your skirt or dress already hemmed at the top and your seams complete along both sides.  So you should have a tube of fabric that seems a bit big for you.

Start about half a cm from the top and keep sewing round.  As you meet the line of stitching where you began move slightly down so you continue your stitching about a cm below the last line.
You can keep this going for as long as is required - a skirts waist band would be shorter and a dress would need a longer stretch of smocking.

  This should create a gathered effect as seen in the skirt I posted a photo of.
I LOVE the effect of it and think it is just so simple to learn and make.

So get practicing and in the week I'll post measurements and a full how to guide of a cute smocked summer dress - perfect for little ones and adults alike.

Who knows maybe the sun will last that long for all you UK readers :-)

Till next time - happy sewing!